This article introduces a fun and creative DIY project that involves creating a calligraphy design on a rainbow bookmark. The main idea of the article is to provide instructions and guidelines for anyone interested in trying out this project at home.
The article begins by explaining the purpose of a bookmark, which is to mark a specific page in a book and prevent it from getting lost or damaged. It then emphasizes the importance of personalizing a bookmark, as it can make reading a more enjoyable experience.
Moving on to the DIY project, the article suggests using a rainbow as the base design for the bookmark, as it is colorful and visually appealing. The first step is to gather all the necessary materials, which include a piece of cardboard, pencil, ruler, scissors, markers in different colors, and a calligraphy pen.
Next, the article instructs readers to measure and cut a rectangular piece of cardboard, ensuring it is long enough to fit comfortably in a book. The dimensions can vary depending on personal preference.
Once the base is ready, the article suggests drawing a rainbow shape on the cardboard using a pencil and ruler. The rainbow can be as simple or as complex as desired, with multiple or few colors.
After the rainbow shape is complete, the article introduces the concept of calligraphy and its significance in adding an elegant touch to the bookmark. It advises readers to practice calligraphy on a separate piece of paper before attempting it directly on the rainbow bookmark.
This will help in getting familiar with the strokes and ensuring a neat and professional-looking design.
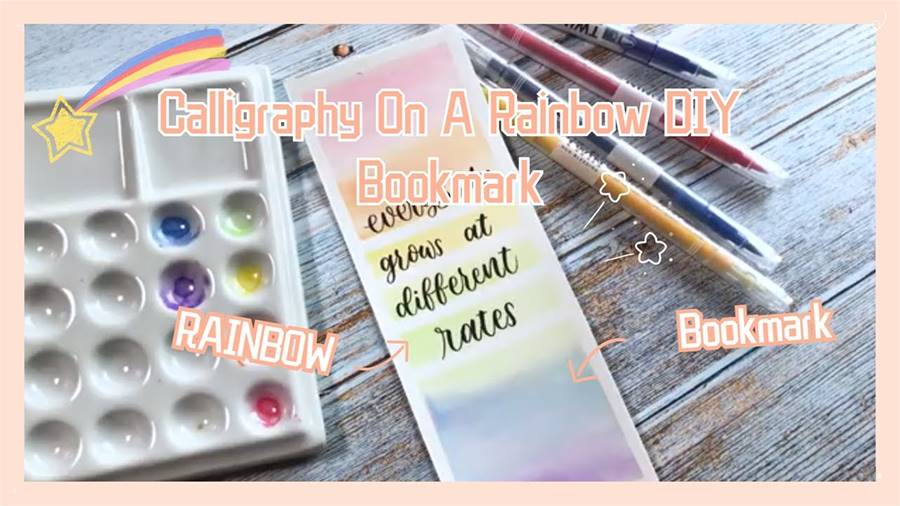
Once comfortable with calligraphy, readers can proceed to use a calligraphy pen to outline the rainbow shape on the bookmark. The article suggests starting with a lighter color and gradually filling in the lines with darker shades. This process will give the rainbow a vibrant and gradient effect.
To add a personalized touch, the article encourages readers to choose a favorite quote or word to write inside the rainbow.
This can be done using the calligraphy pen or markers. The article suggests using contrasting colors to make the text stand out.
In conclusion, the article introduces a creative DIY project of creating a calligraphy design on a rainbow bookmark. By providing step-by-step instructions and tips, it aims to inspire readers to personalize their bookmarks and make reading a more enjoyable experience.